
Welcome to the Yenka Tutorial Series
 ScienceMan’s having a such blast playing and learning with Yenka, I thought, why not put some Yenka ideas online for teachers and students to check out?
So without further any further blabbing, here’s today’s tutorial:
Yenka Light and Sound – Ray Diagrams
One of the great things about Yenka is its ability to simplify complex demonstrations. A good example of this is the optics bench, which for teachers can be a real hassle to set up, and even more difficult to demonstrate to a whole class. It’s very challenging to show a candle that is in focus to 30 students! Not that you don’t want students to use an optical bench, but it would be great to have an interactive whiteboard friendly tool to be able to easily demonstrate to all your students at once.
In the Yenka Light and Optics module, creating ray diagrams is a simple as dragging and dropping. In this case, all you’ll need is an optical space, and object, a lens or mirror, and a screen:
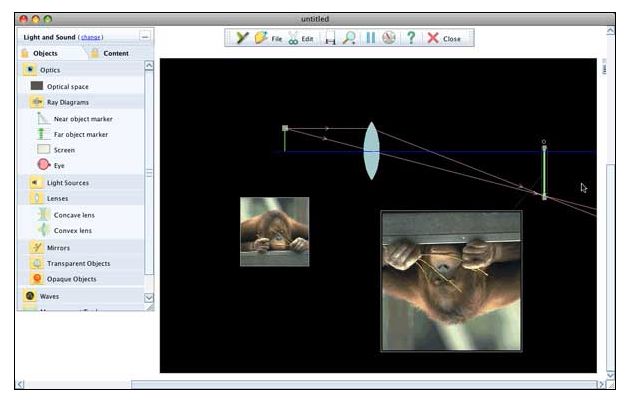 Once you’ve dragged those components onto your workspace, it’s just a matter of “playing” with the position of the object in relation to the lens, and positioning the screen where the image occurs. It’s that simple. Please watch the following tutorial for a complete guide to setting up your own Yenka ray diagrams:
 Questions about Yenka? Feel free to comment on this post. Also, the good people at the Yenka website have also put together their own fantastic collection of tutorials.
